

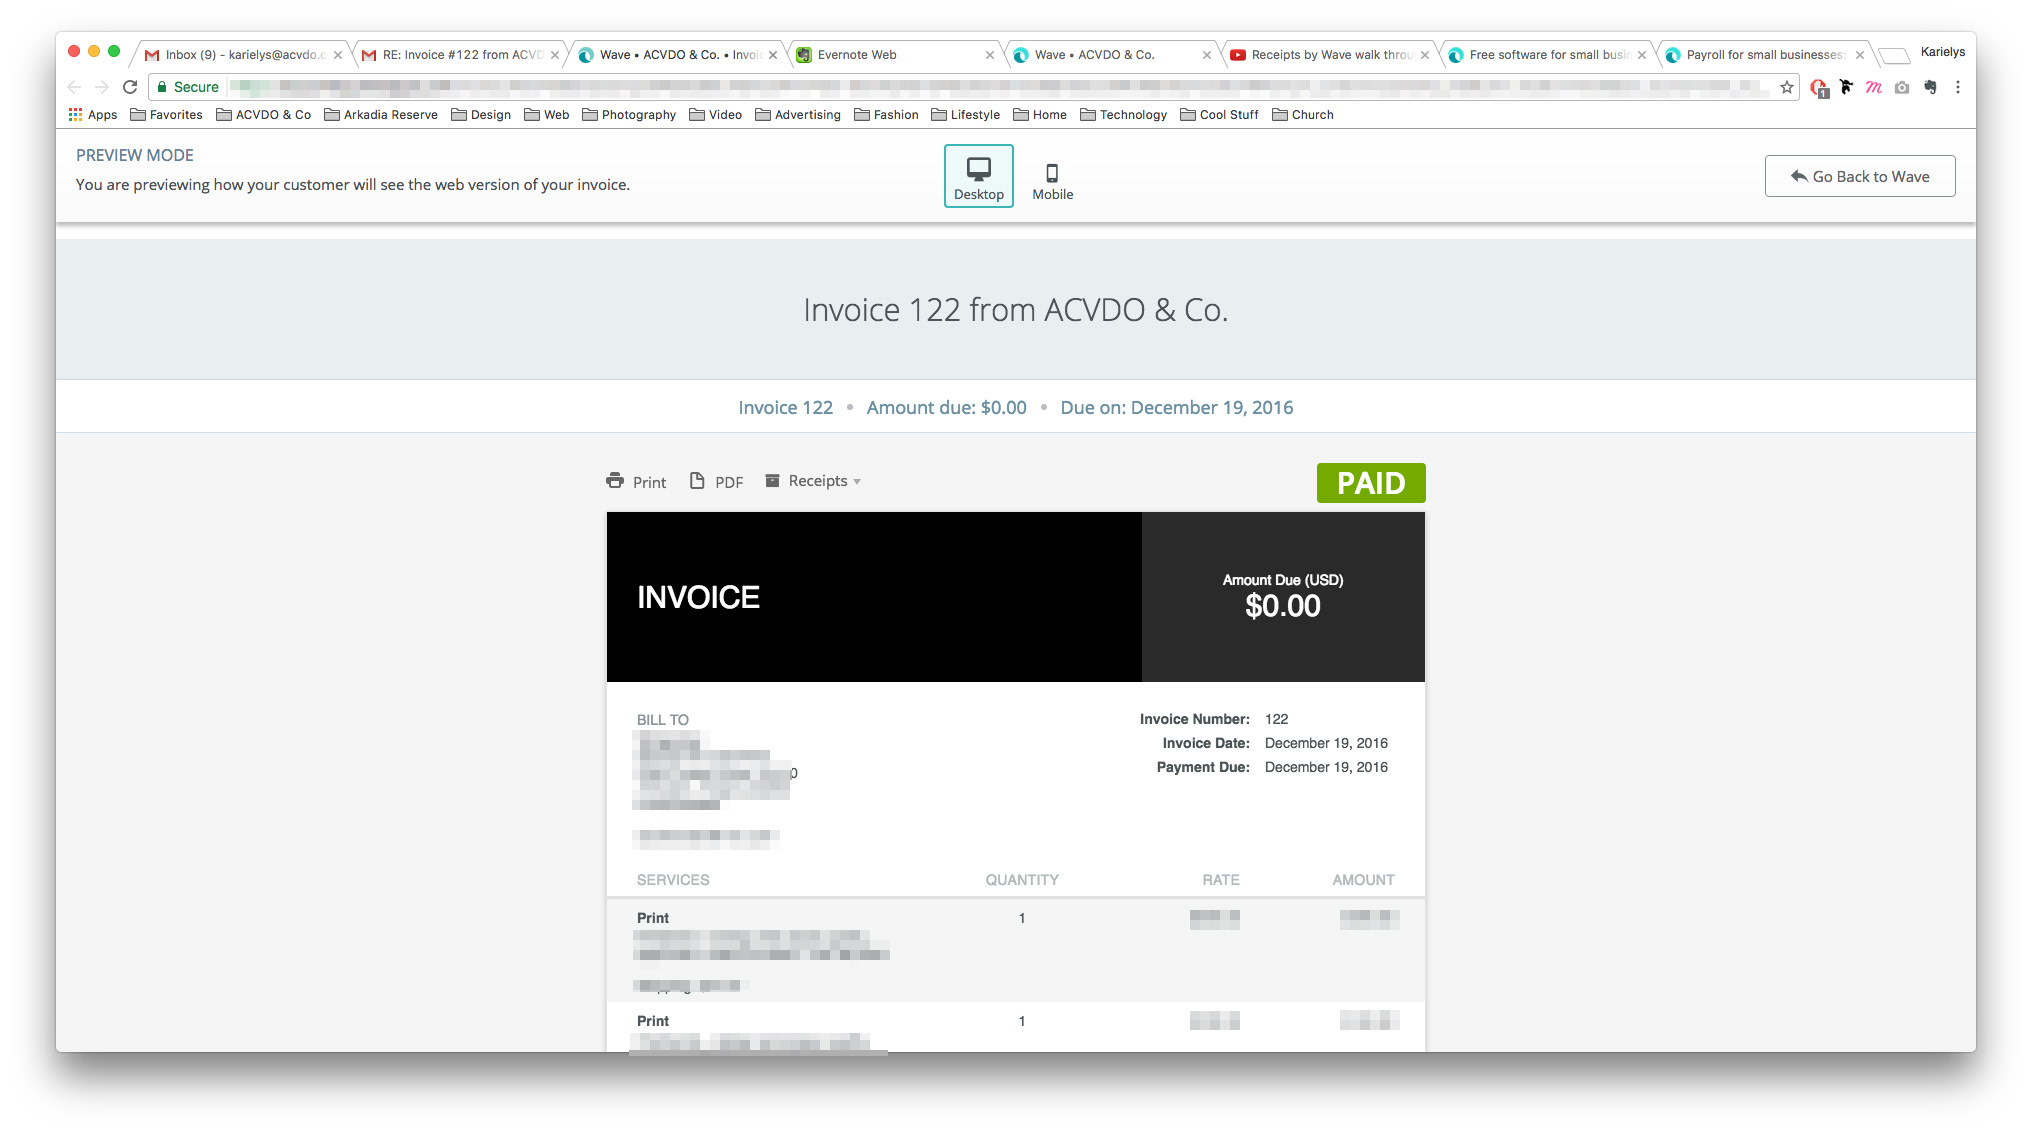
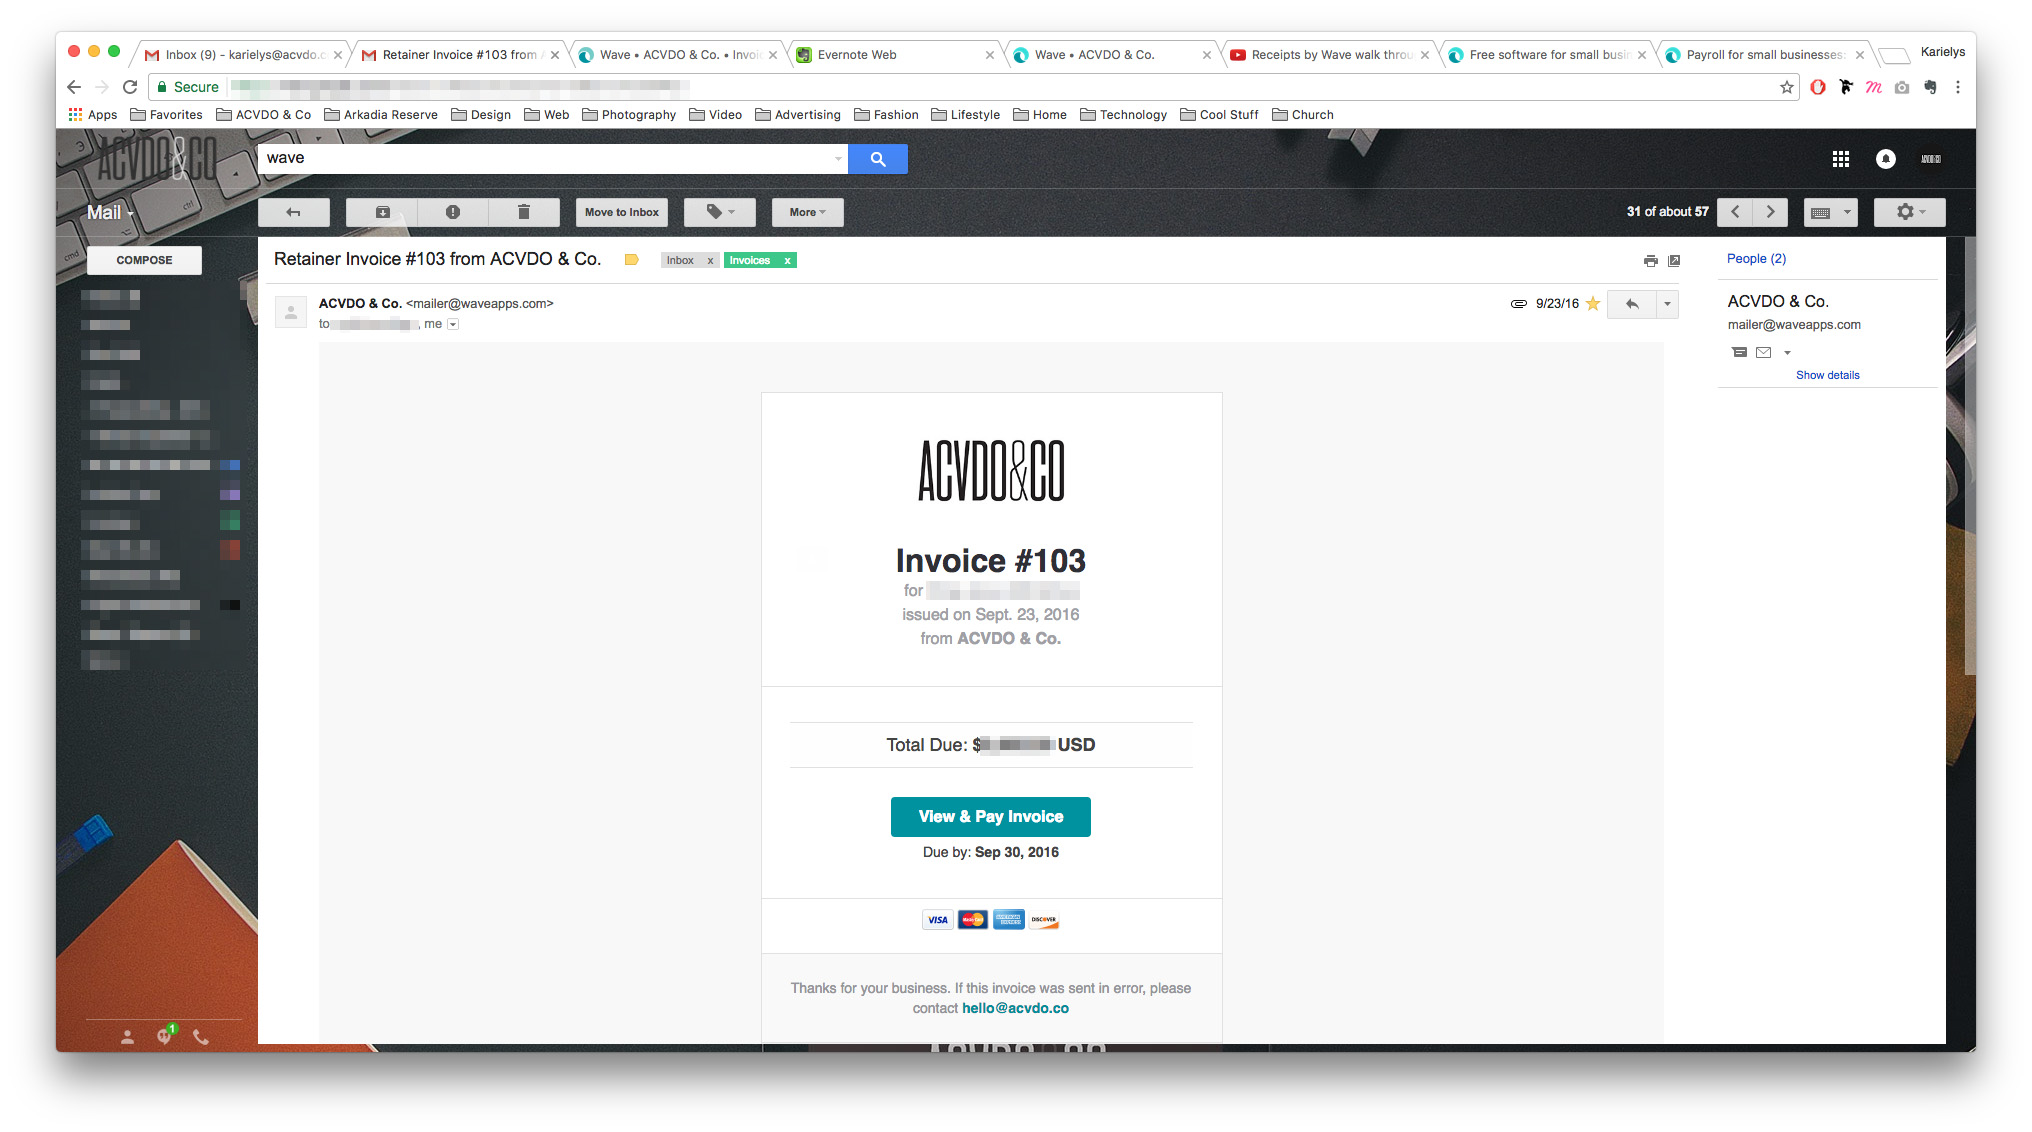
When we first started ACVDO Co., we did everything manually. It was great. We loved designing our invoices (you can see it here) and getting compliments on how beautiful they were. I think it’s awesome when you get to turn usually ugly things into beautiful things. And let’s be honest, invoicing isn’t the funnest thing ever for either parties, so let’s just be nice and pretty while we’re at it.
Then one day, invoicing manually became too much work and it was hard to keep up. Every time we invoiced, we had to open InDesign, customize the form to each client, save it, export it, email it. Too much. So I started shopping around for an invoicing platform that could take off some of the load.
I tried Quickbooks first. Okay, it’s like the mother of all invoicing/accounting platforms but that also meant that it was complicated. Guao. It was challenging for me to get it, especially given that neither Angel nor I had any kind of accounting background. So after a few days, I opted instead for WaveApps.
I heard good things about it. Many online sites said it was easy/good for small businesses (here’s an article), so I made an account, set it up, and explored the platform. Long story short, I loved it. It did exactly what I needed it to do (create invoices, send them, and manage them) without any complication/confusion.
Step 1. Customizing your Invoices
One of the first things you do after creating your account is to customize your invoice. I had a hard time with the three templates they give you because I wanted to make ours extra special. But that’s all they give you so I had to make the best of it.
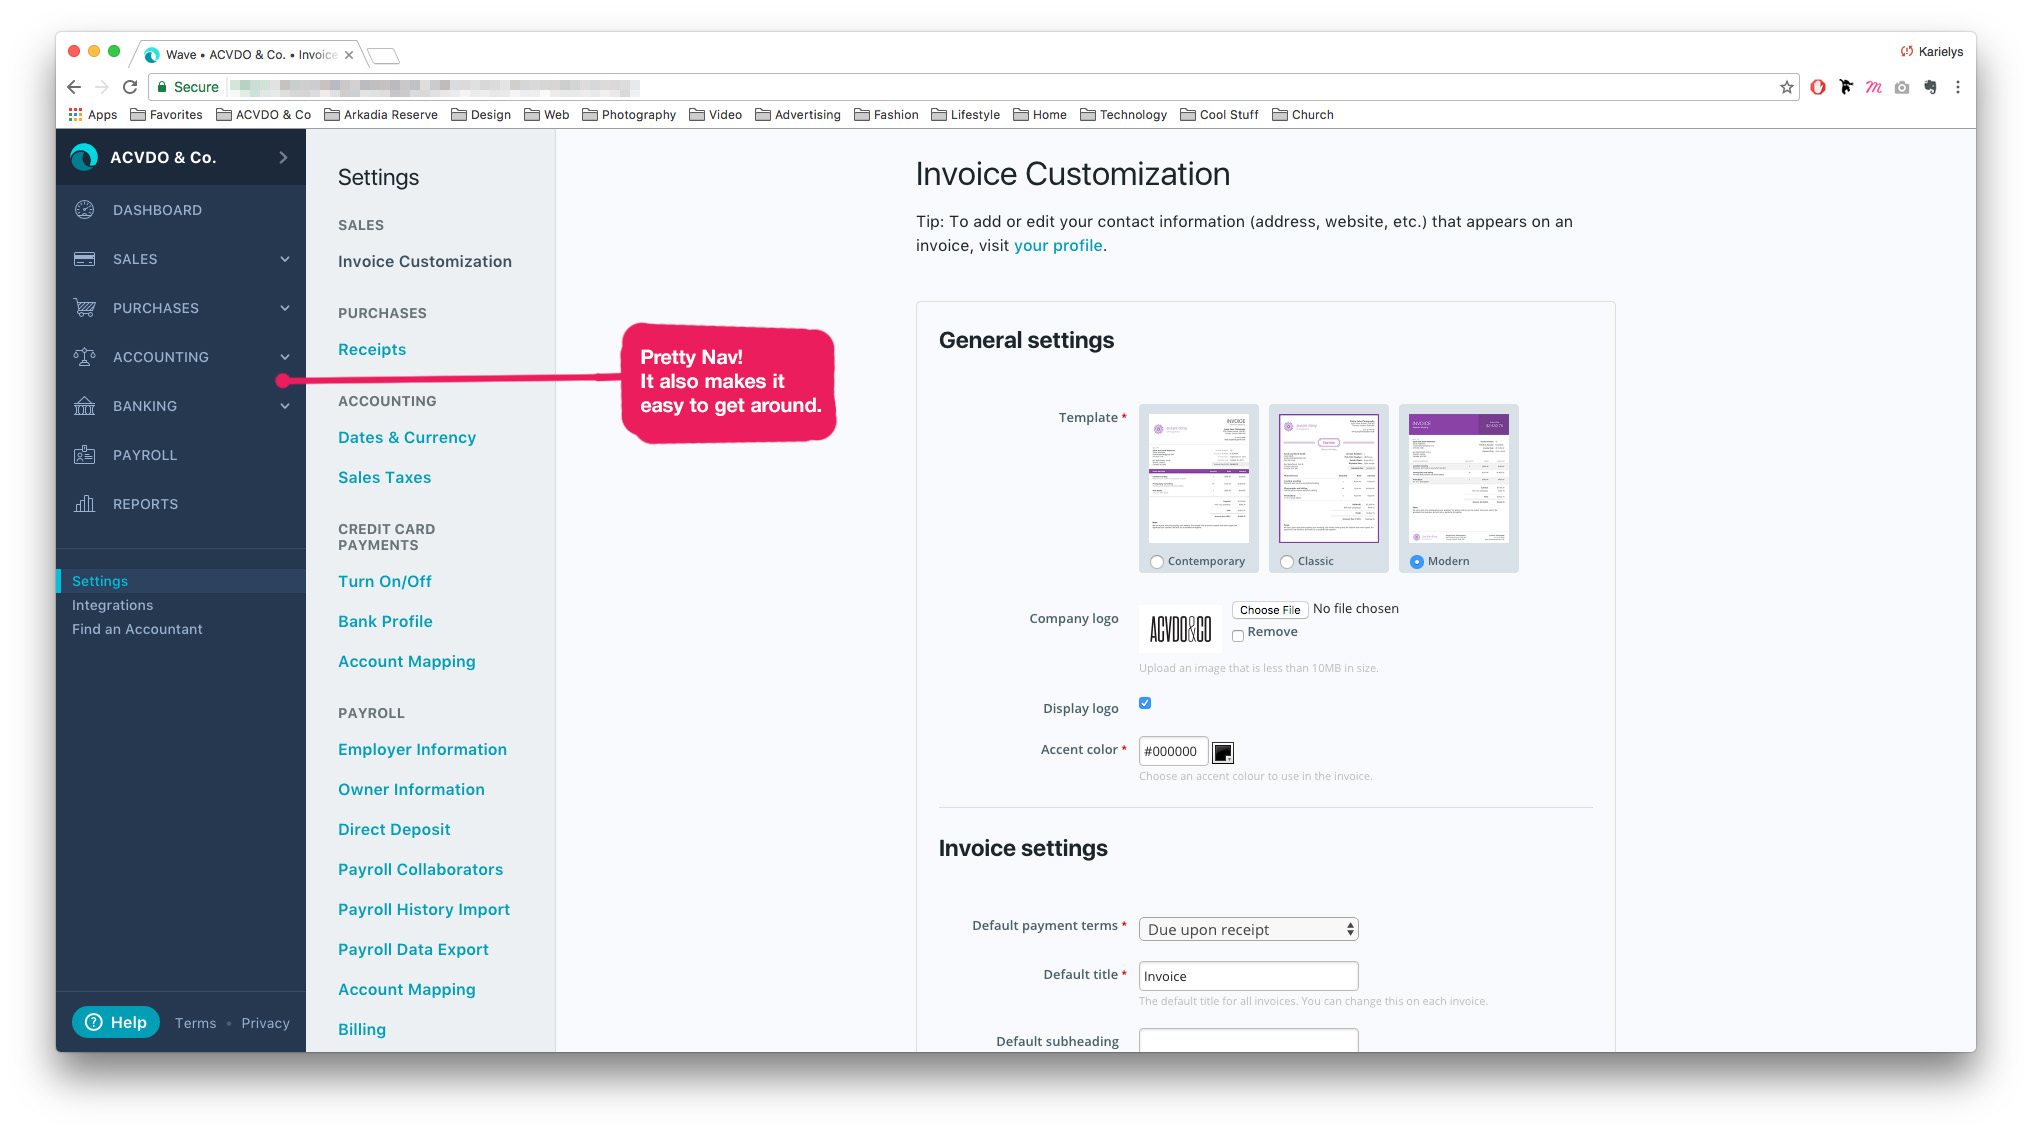
Screen Overview:
You can customize color
Add your logo
Select invoice settings
There’s also a side menu to navigate all the sections/services of WaveApps.
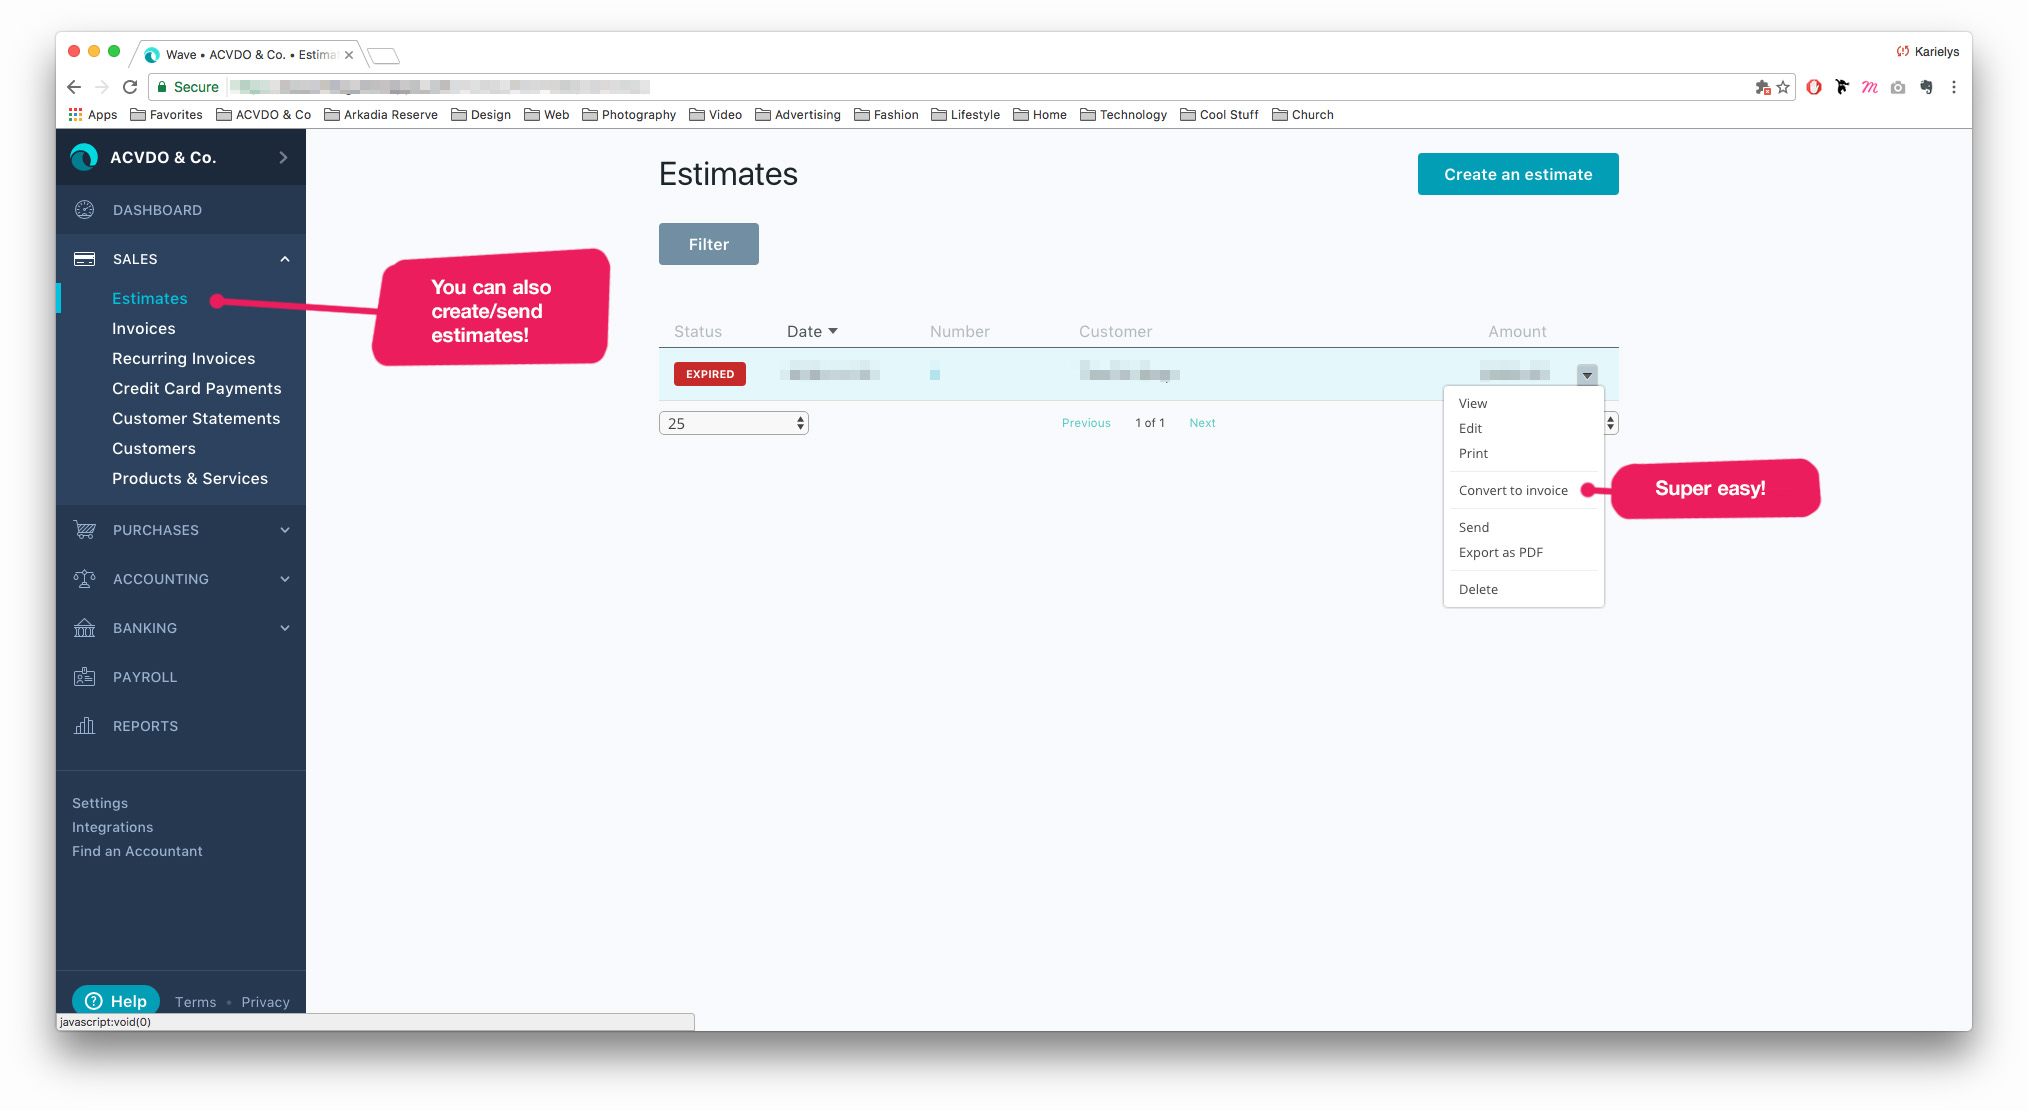
Step 2. Creating your Invoices
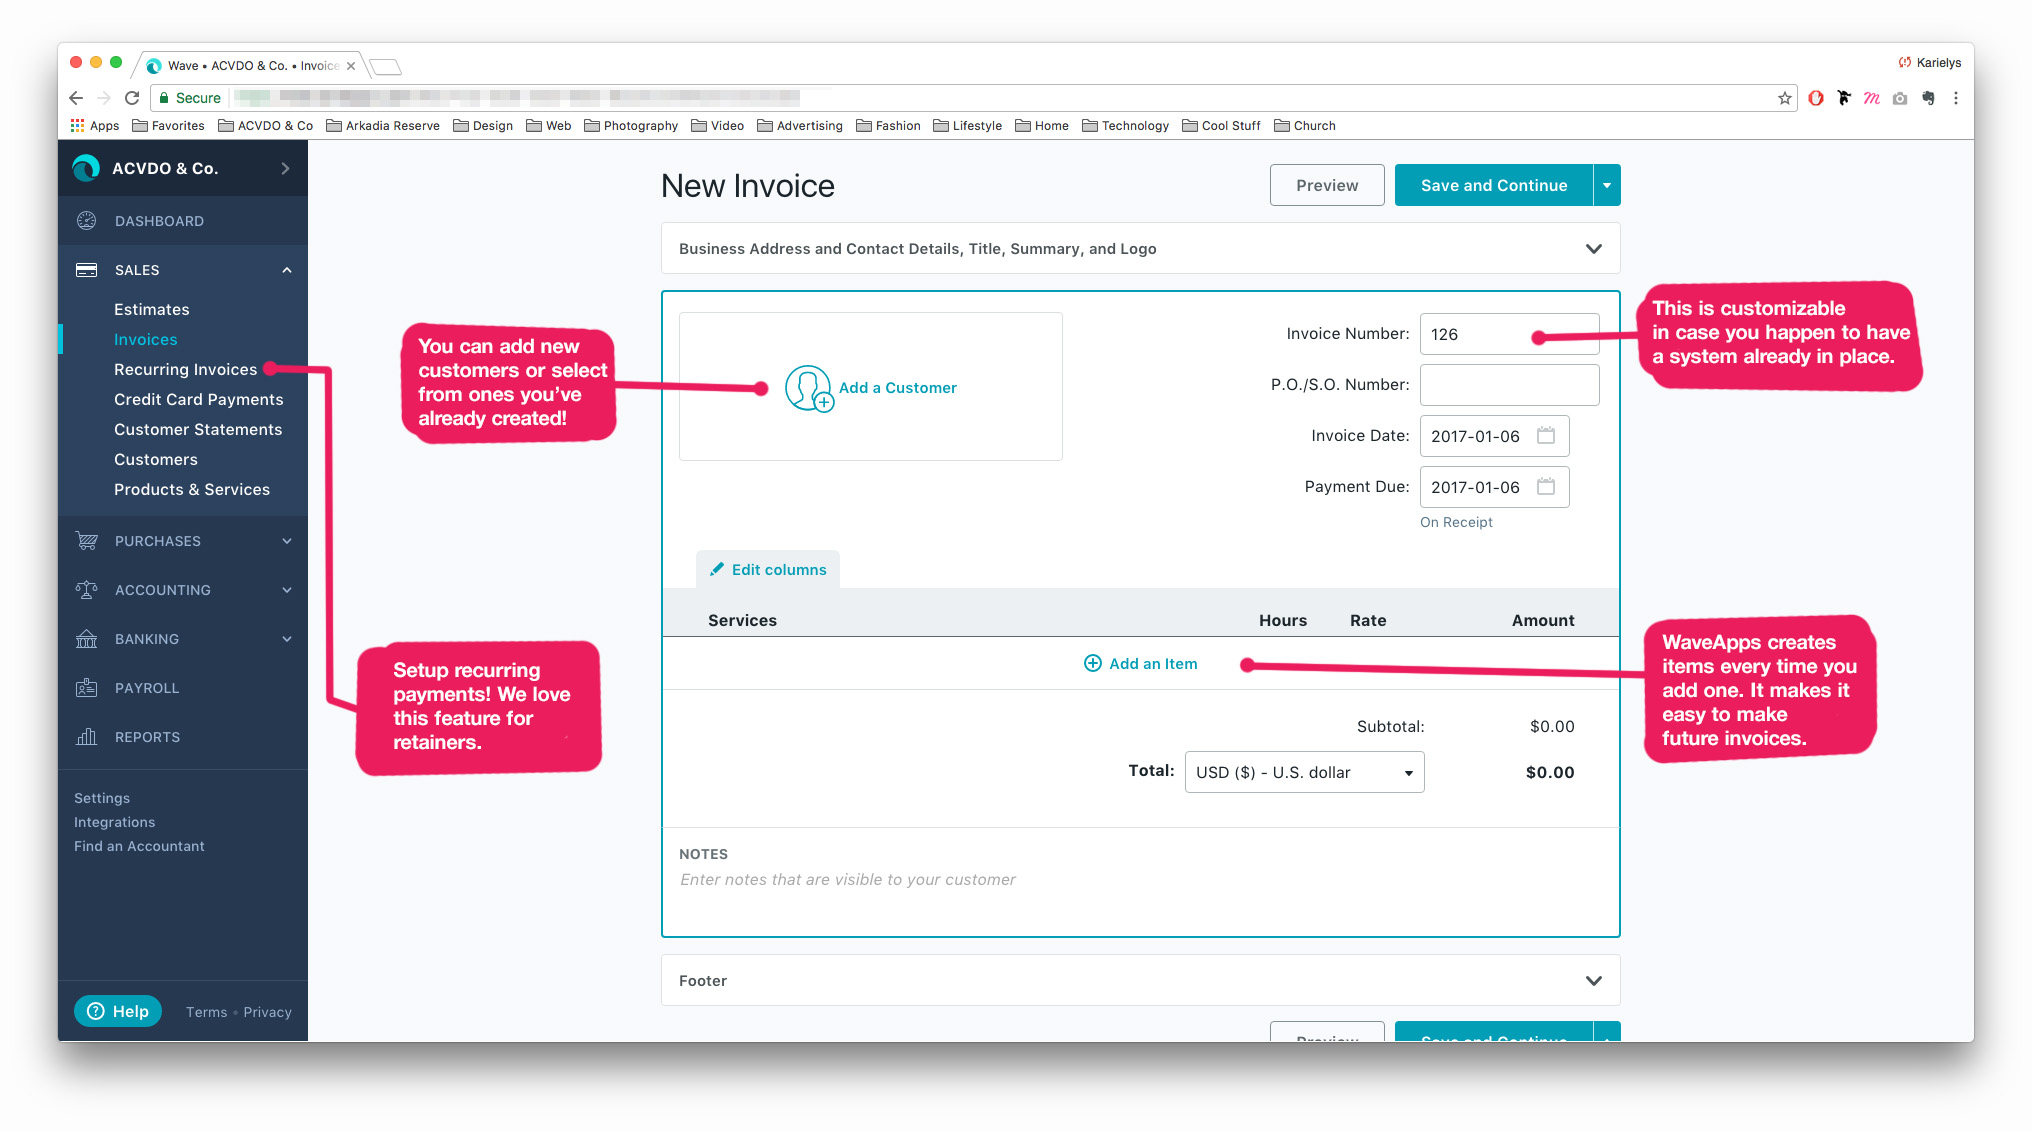
Screen Overview:
Add new customers or select current customers
Enter a specific invoice number if you need to
Select payment due date (day of, net 15, net 30, etc)
Add your service/product items. (You can edit the columns to display quantity instead of hours, price instead of rate. This is a neat feature since it adjusts the rest of the form according to what you select.)
You can setup recurring invoices for retainers. You tell WaveApps when to send it and how often and it’ll do just that.
Pro Tip: Generalize items because WaveApps will save them for future use. For example, do “Print” instead of “Print for Specific Client” so that in the future you can select “Print” and customize the row as you need for whichever client.
Step 2 > Creating your Invoices > Deposit/Balance
A drawback I’ve found with WaveApps is that it doesn’t have a way for you to create a deposit invoice and a balance invoice for a specific project.
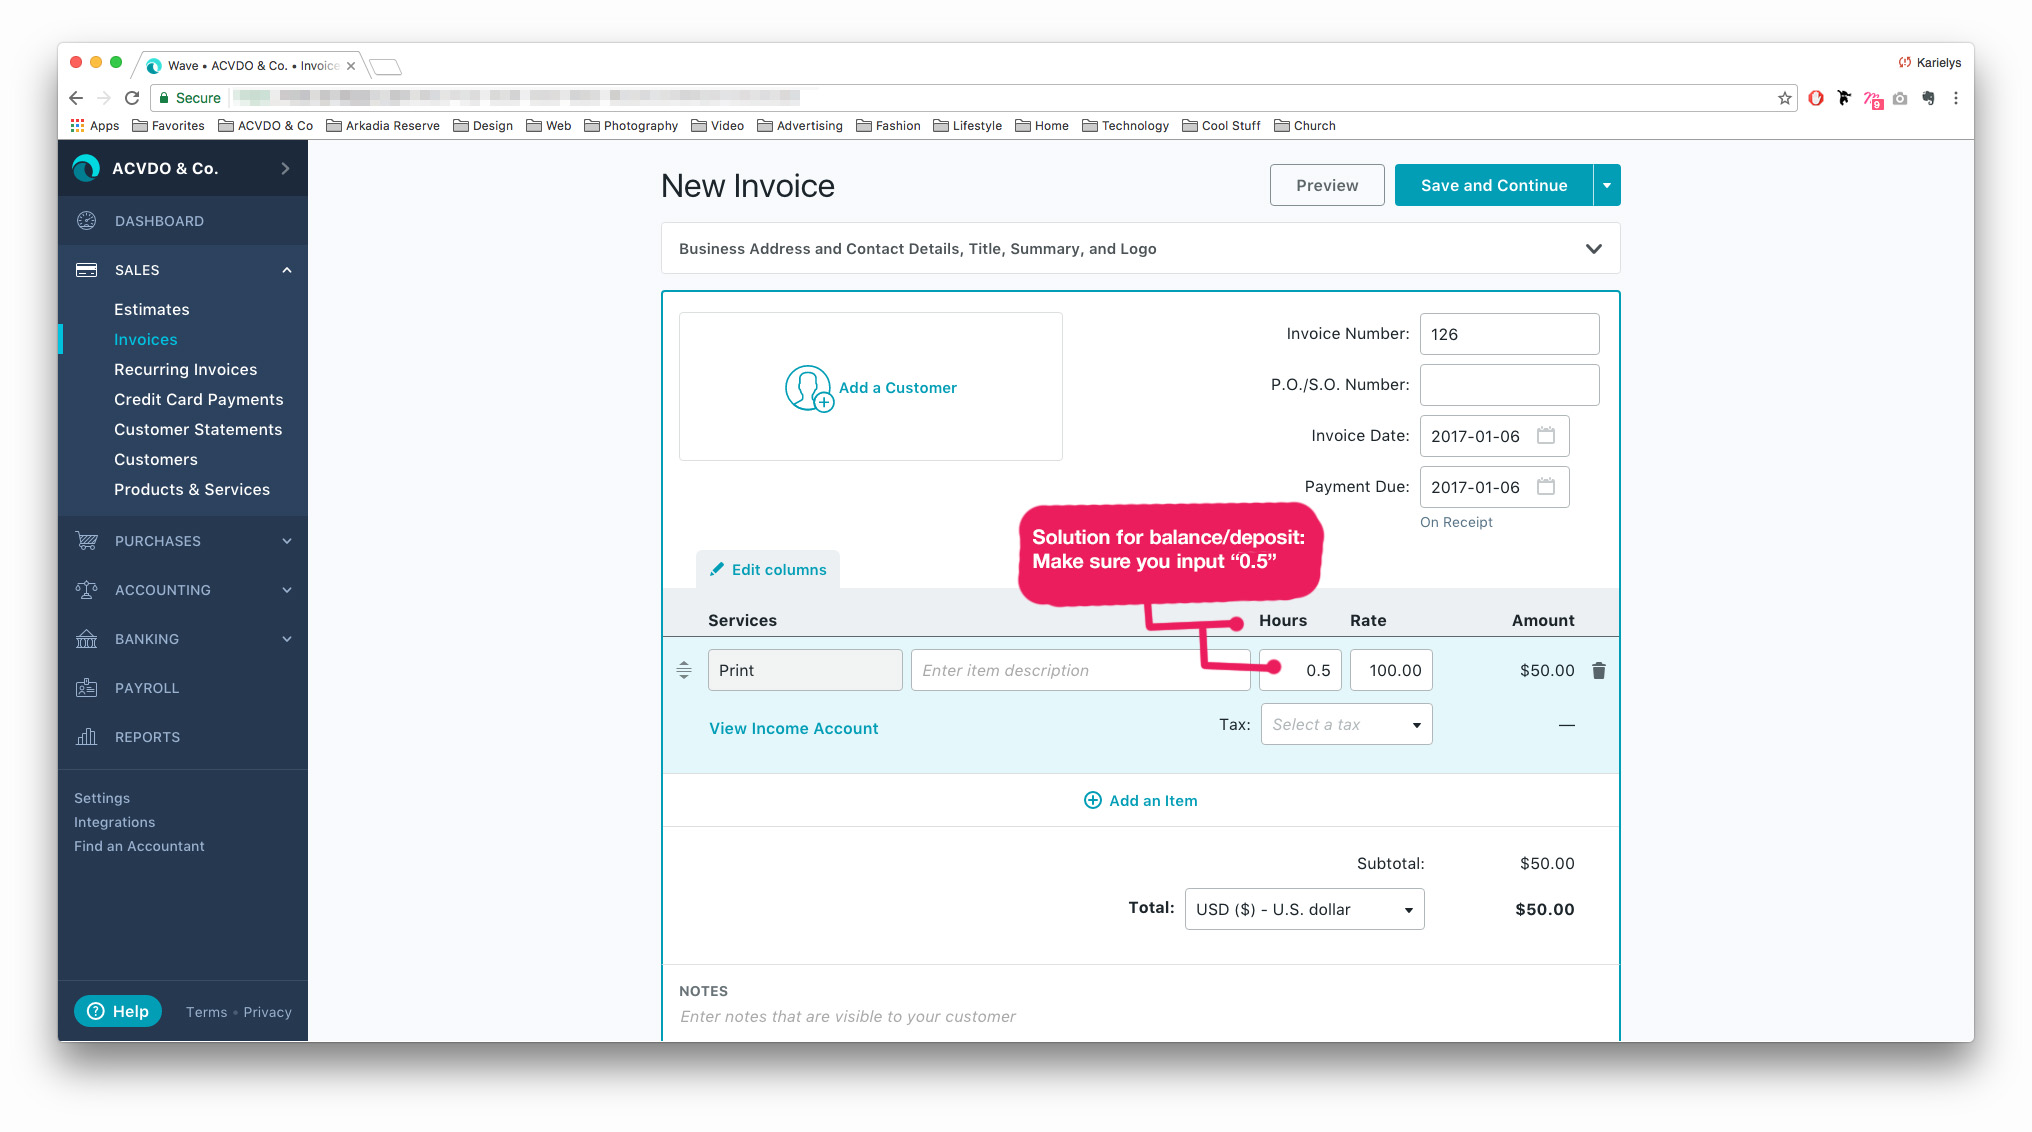
Pro Tip: You either create separate invoices or input “0.5” to tell it to adjust the subtotal of your rate/price, see image below (you can also do other values as 0.25 if you’re taking 4 payments)
Step 2 > Creating your Invoices > CC Payments & Approving your Invoice
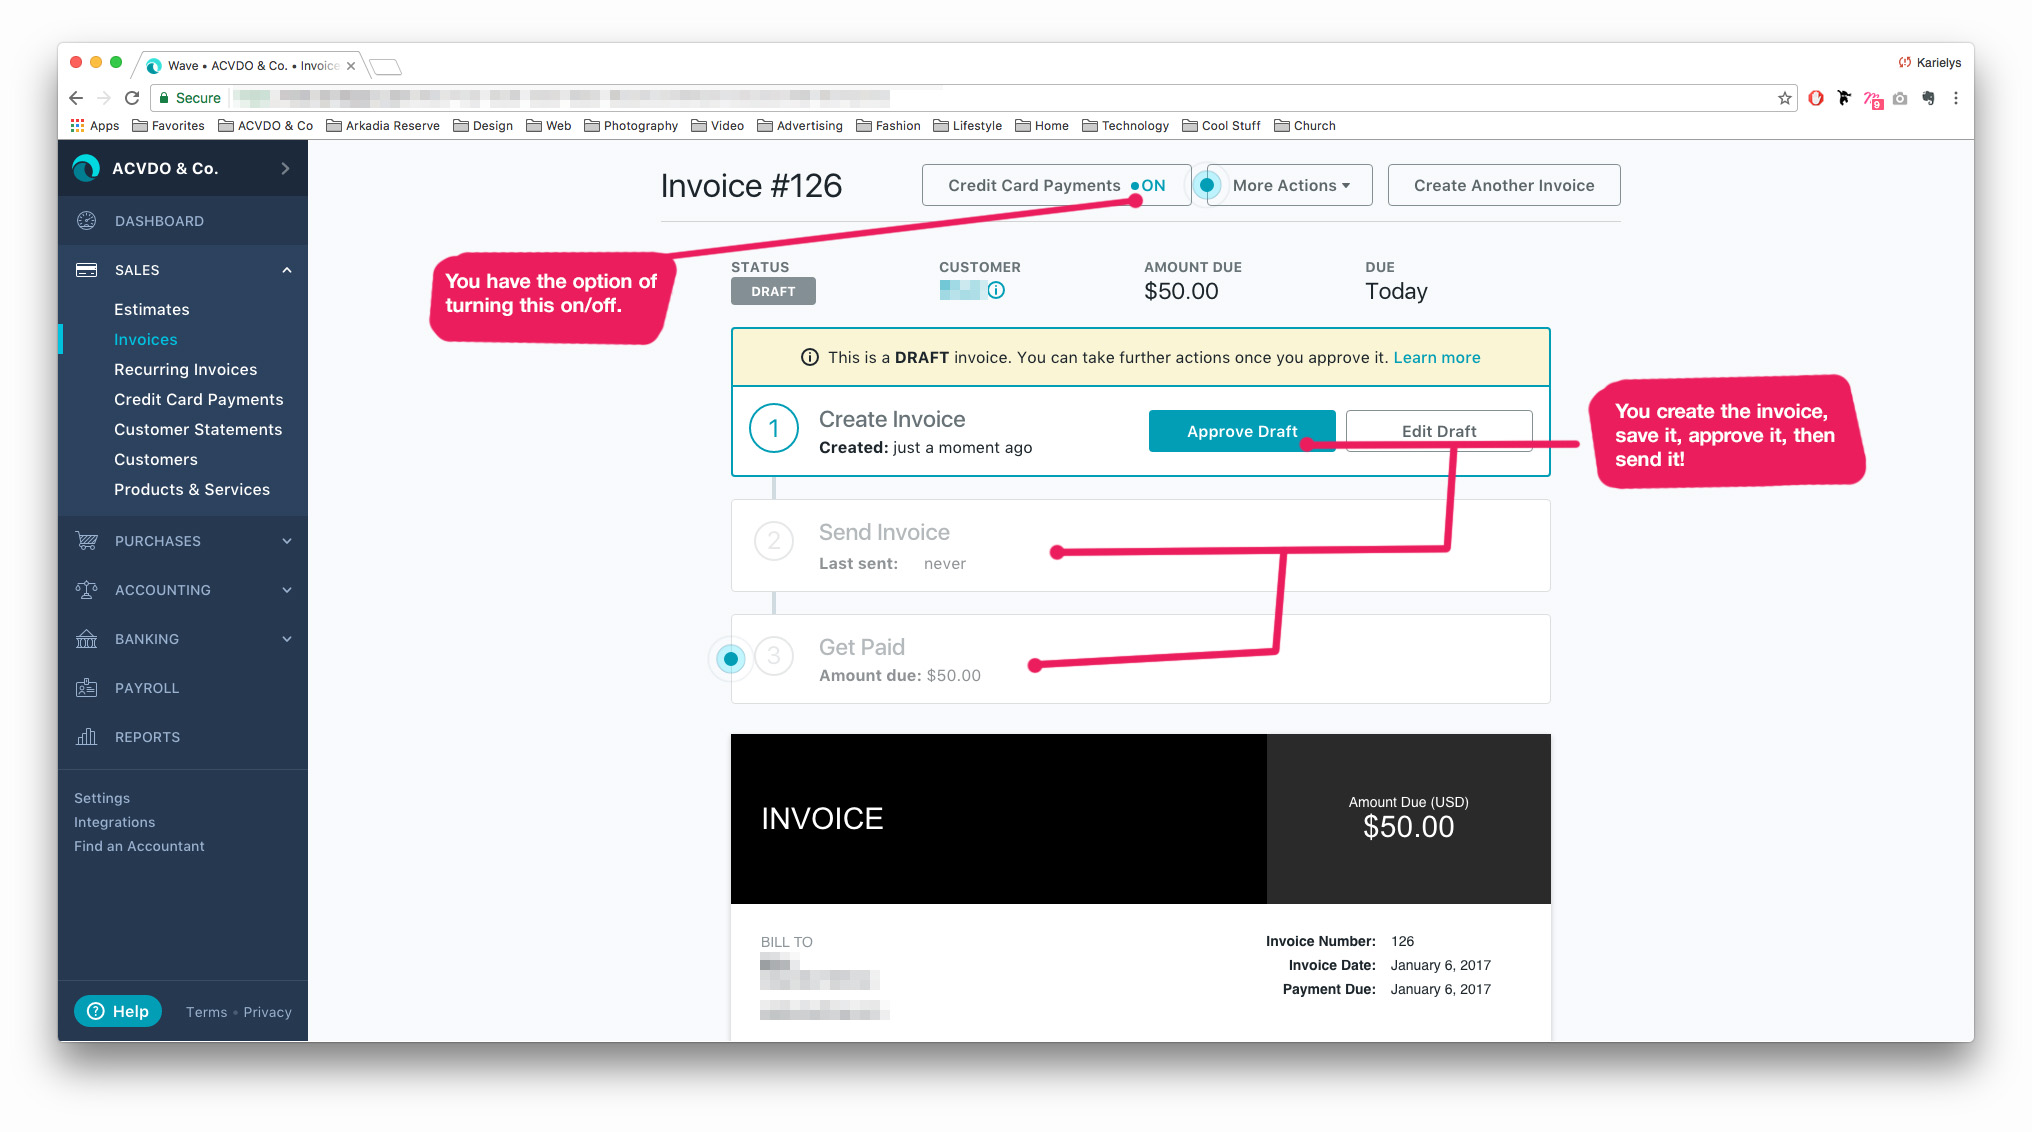
Screen Overview:
If you link your back account, you can accept online payments! You can also turn this feature on/off
WaveApps indicates the status of the invoice
In order to successfully send an invoice, you have to create it, save it, approve it, and send it. WaveApps lets you create it, save it, approve it, and come back to it when you’re ready to send it.
Step 3. Sending your Invoice
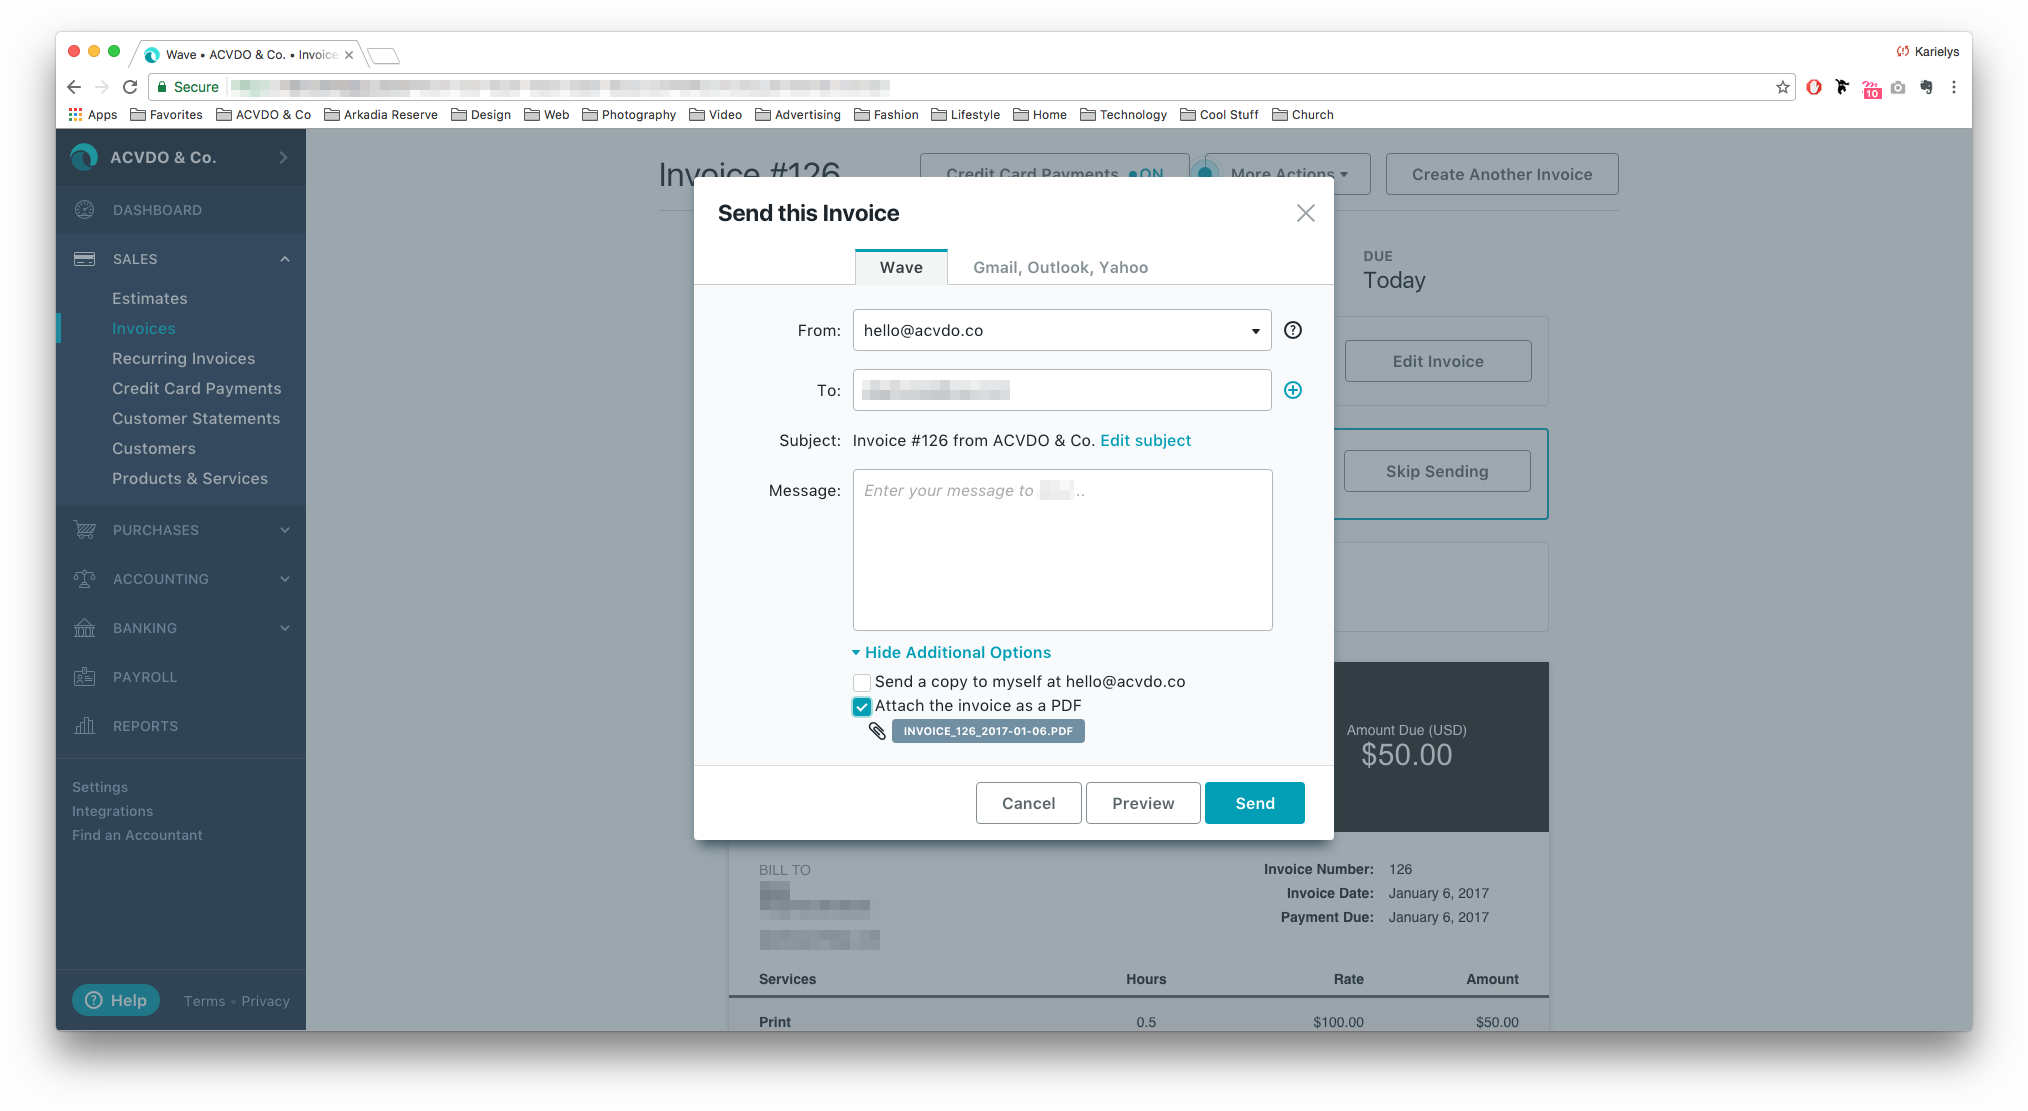
Screen Overview: WaveApps has a really neat sending feature. Here are a few highlights:
It automatically inputs your email in the “From” field (you will add it in the setup process)
It automatically inputs the clients email. You can add another email
You can attach the invoice as a PDF
Pro Tip: WaveApps also lets you send invoices through Gmail. I do this sometimes when I need to attach other forms to the invoice (such as an hourly report; we use Toggle.)
Step 4. Managing your Invoices & Payments

Screen Overview:
It uses icons/color to indicate the status of each invoice.
You can send reminders!
Send receipts and add receipts (learn more about adding receipts here)
Step 4 > Managing Invoices & Payments > Managing Payments
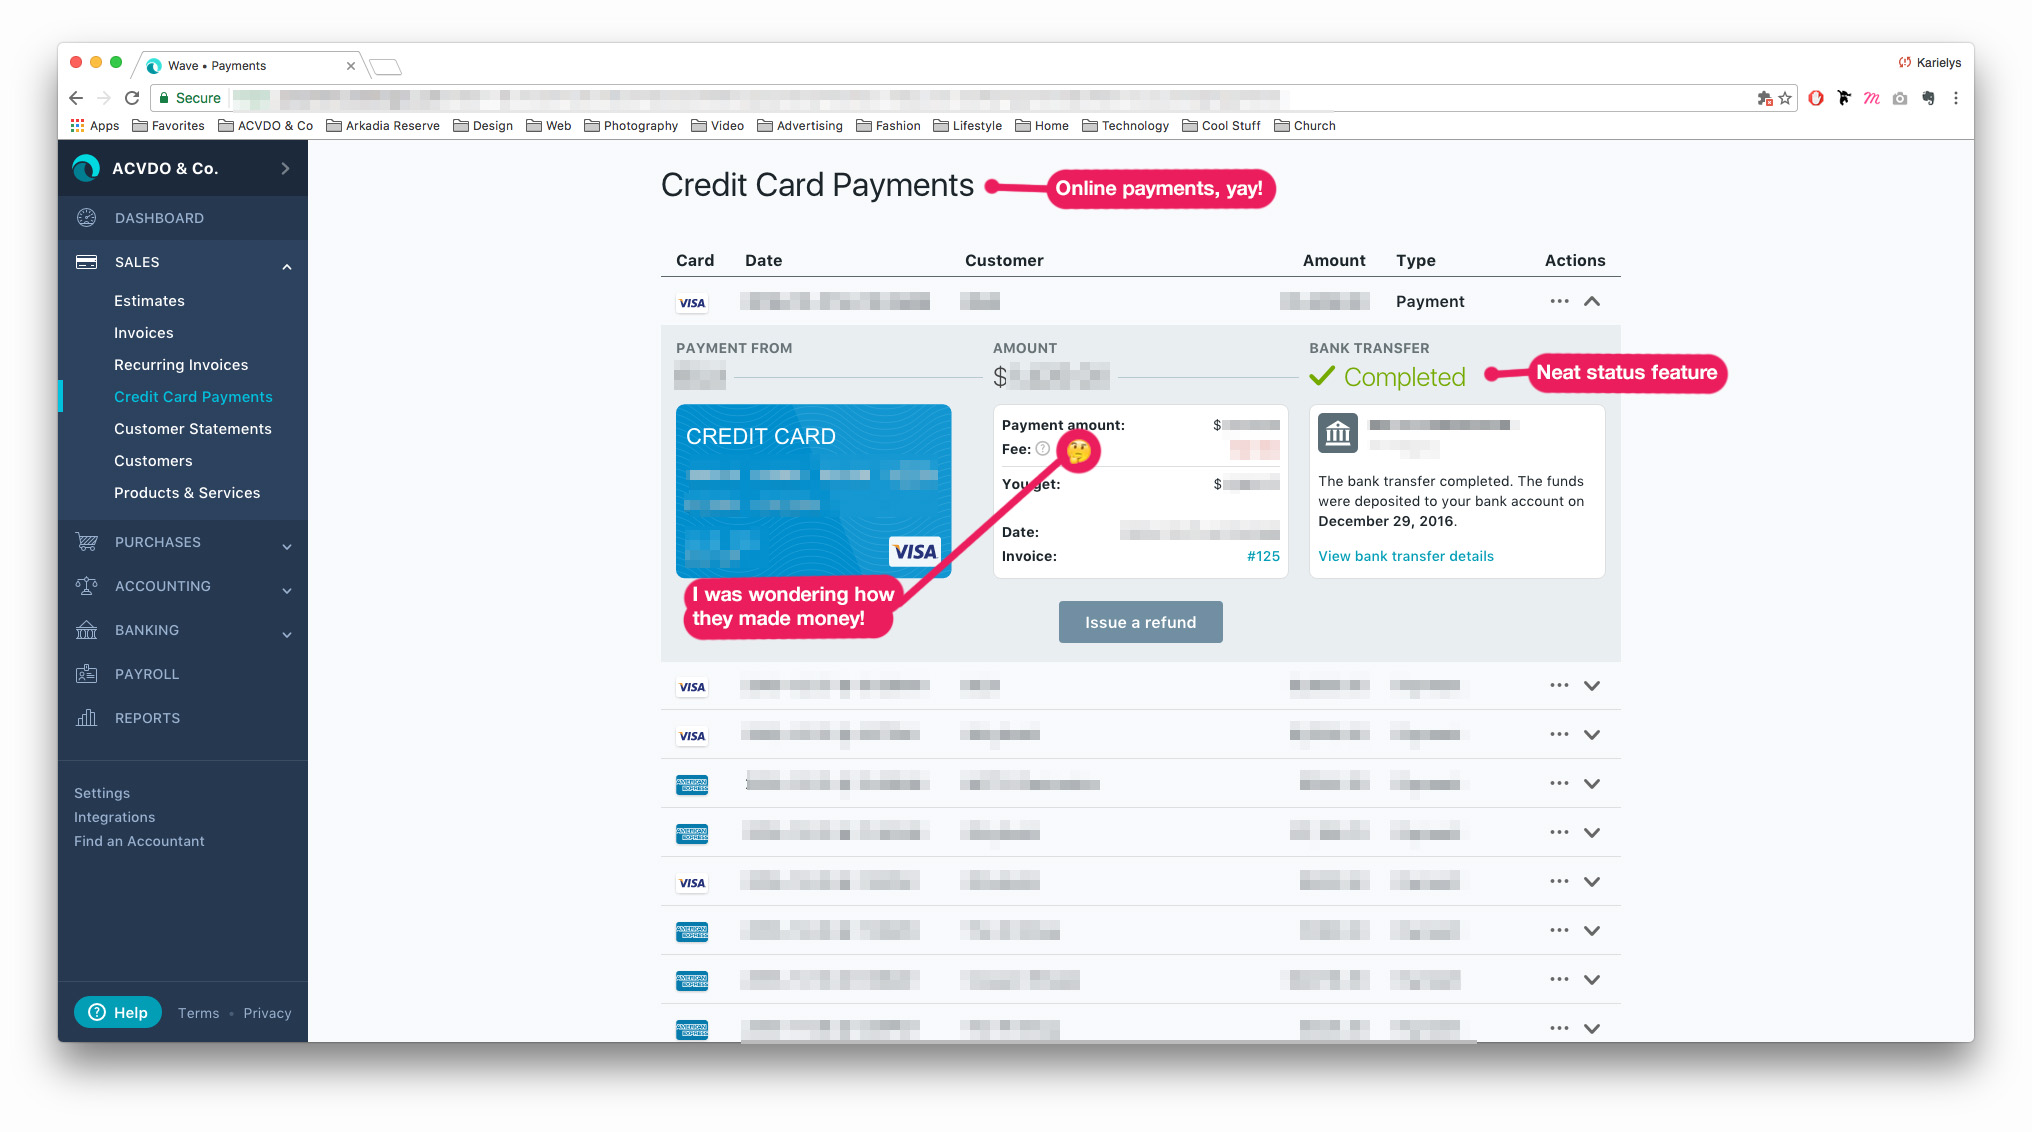
Screen Overview:
The most recent payment is highlighted with a pretty picture of a CC.
Every payment has details with dates, invoice number, client, etc.
There is a fee for online payments (here are the breakdowns)
Other Features
Price: Free. Payroll requires an upgrade. Learn more here.
Support: Minimal. There’s a ticketing/email system. I’ve used it once; haven’t had much need for it. There’s premium support that requires an upgrade (couldn’t find the price online, sneaky! But again, I haven’t had any need for it because it’s pretty intuitive.)
Love this invoicing program.
Thank you for the recommendation.
-Ayo.
🙂
http://giphy.com/gifs/steveharveytv-steve-harvey-whoop-d2Zlbe97YmGvk0ec
Thank you for sharing! This was incredibly helpful!
Thanks Ms. G! We always love hearing your kind words! Let us know if you think there’s anything else we should write about!
Hi Kary,
Thanks for the detailed write-up, and for using Wave!
I’d just like to correct one point please – Wave Support, just like Wave Software, is entirely free. There is no ‘premium’ option that you need to pay for. To get support in Wave, just click the ‘Help’ button at the bottom of the left hand navigation bar to search articles from our Help Center and to reach out to our Support Heroes at Wave HQ.
Have a great day!
Paul | WaveHQ
Thank you Paul! I’ve edited to text to reflect your clarification! Really appreciate it!
Thanks for the heads up Paul!